
We are pleased to announce our latest refrigeration installation service for a chain of pubs in Manchester. We have been working with this customer for over a year now and have carried out 3 other installations for them.
Heat Load Calculations
First, we carried out heat load calculations to ensure than an oversized system was not Quoted for. Carrying out these calculations correctly meant that we beat a competitor on price. We took the dimensions of the room, the heat loss though isolation, the specific heat load of the product and the number of door openings into account along with a list of other calculations.
Time Served Engineers
Our engineers have learned these heat load calculations and the practical side of our industry by attending a 4 year course at college.
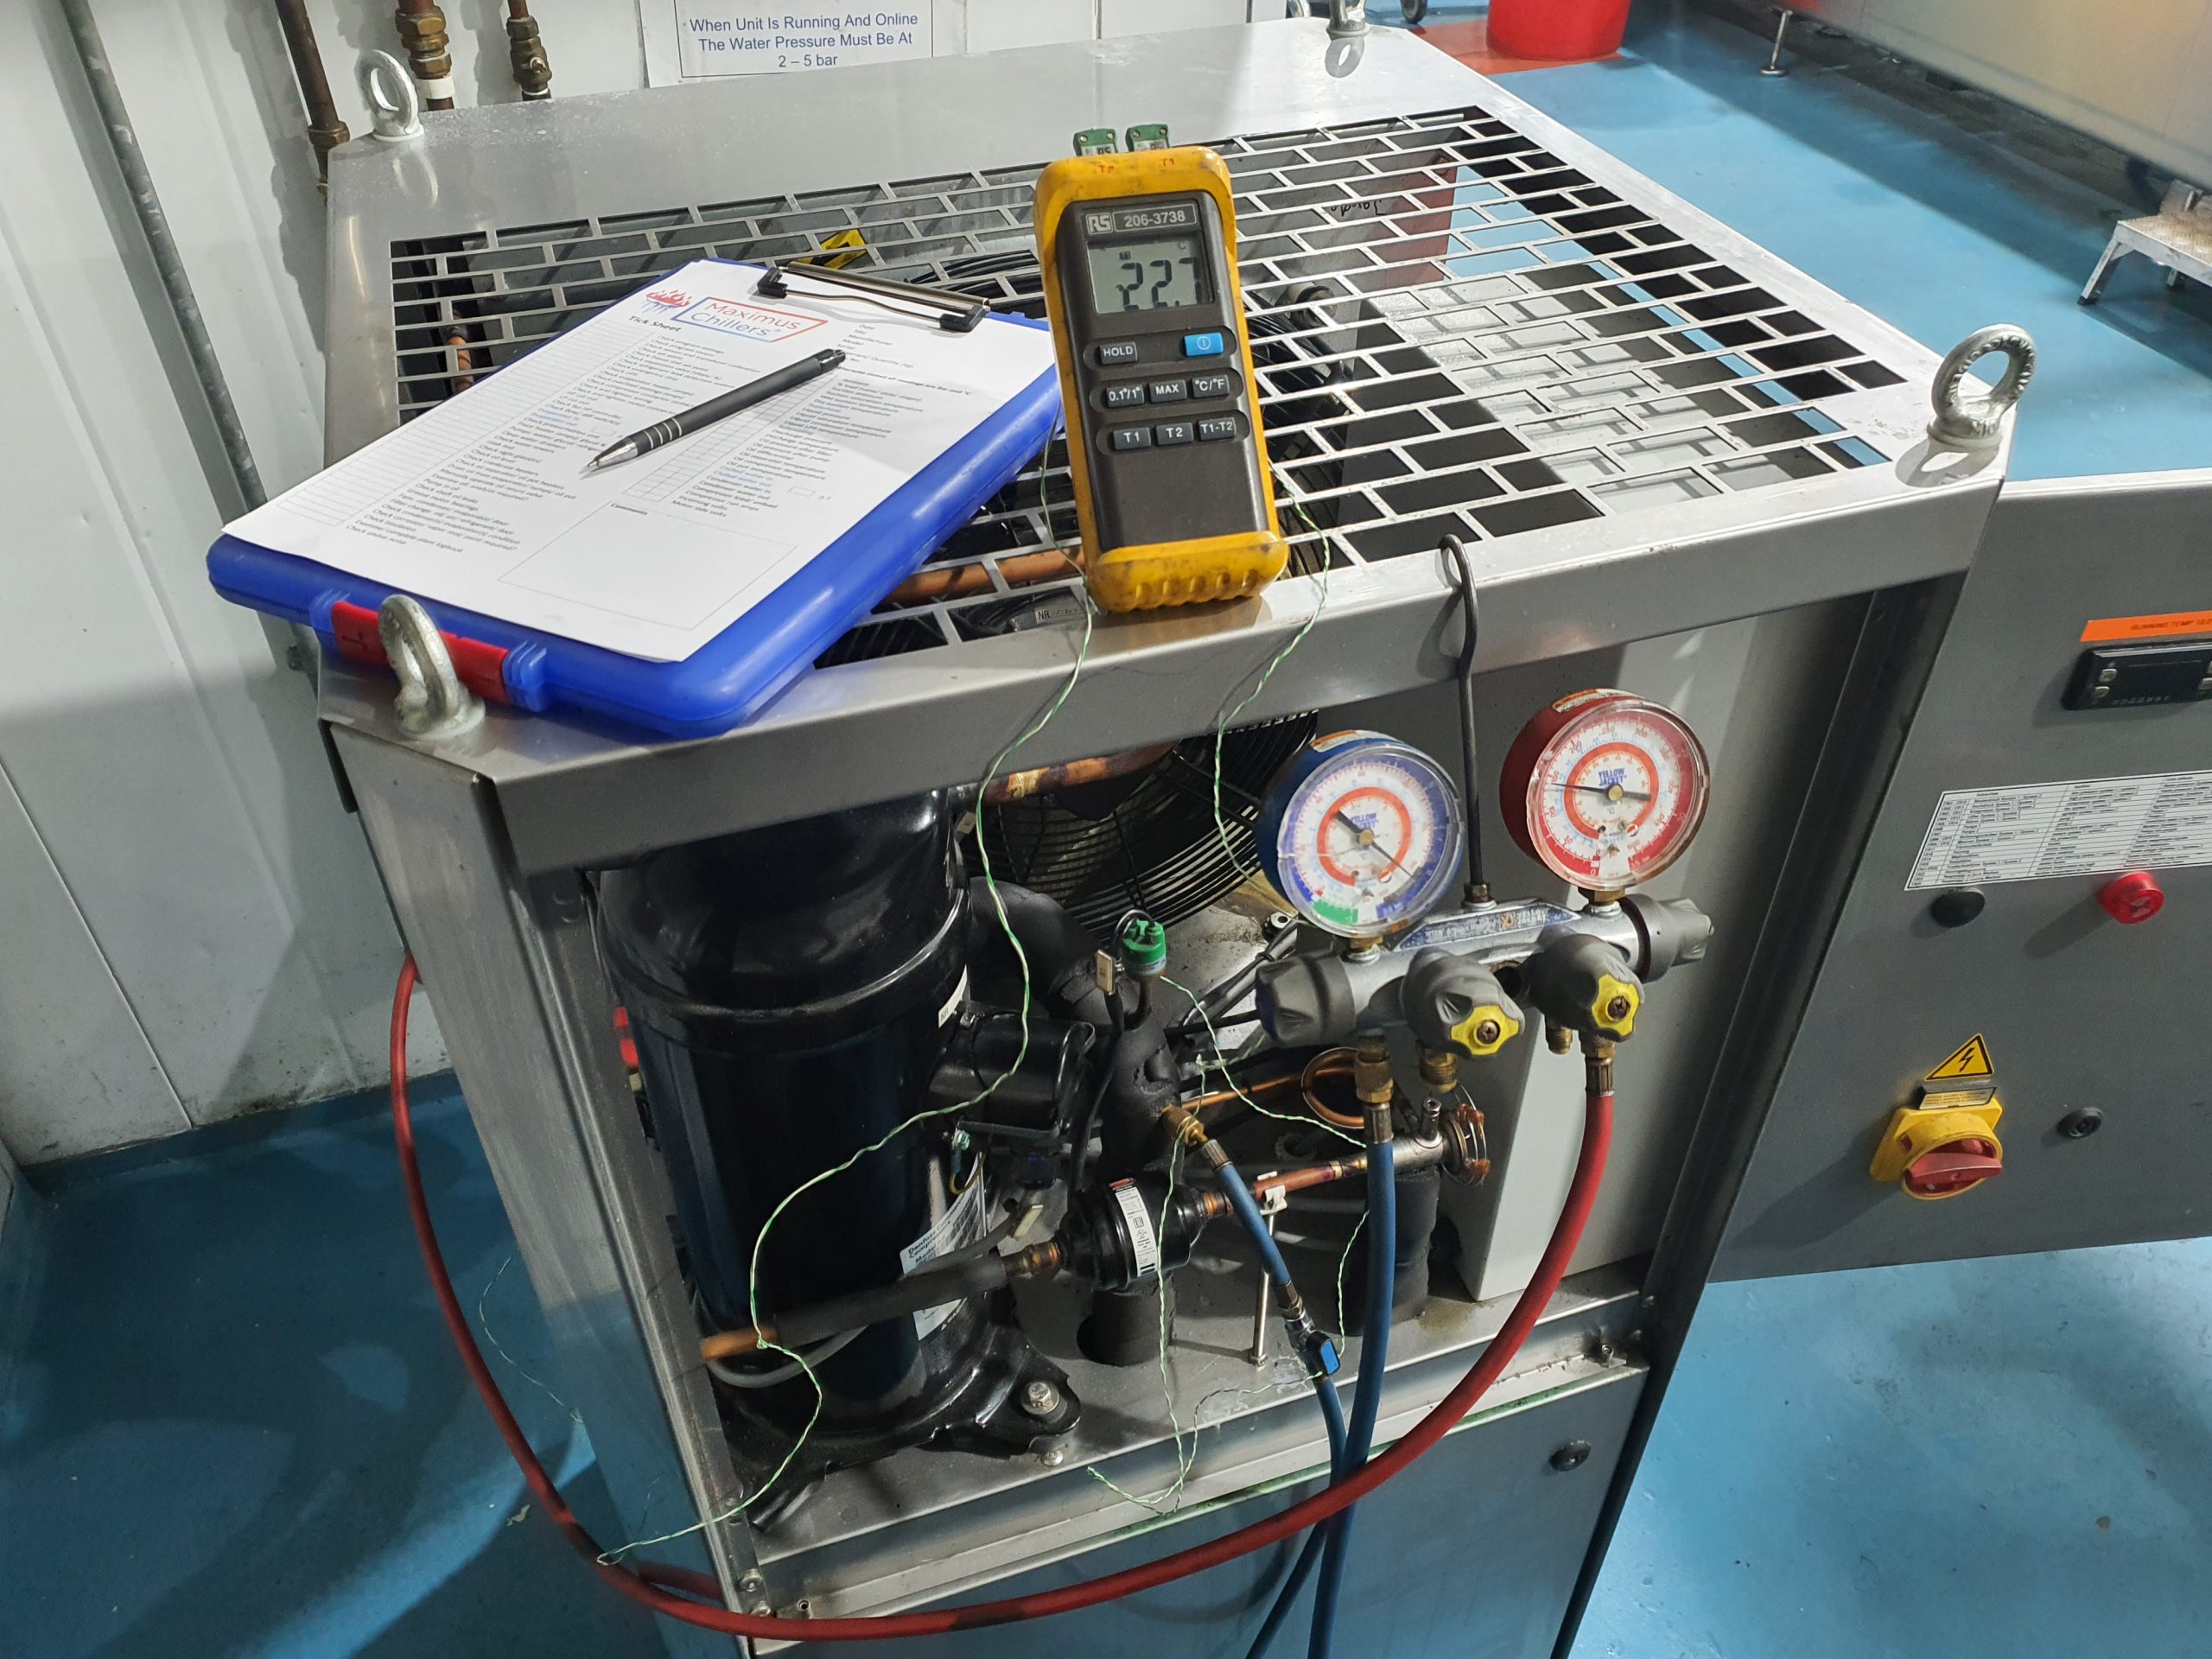
Equipment
Each company vehicle has all of the necessary specialist equipment carried as standard. From a vacuum pup to an oxy-acetylene brazing torch.
0161 237 3727
service@maximuschillers.com
Installation Case Study
Our two man team met up at 8am to go to the suppliers. They needed copper pipe for the suction and liquid pipes, lagging for the suction and an isolator for the condensing unit. After planning the job, they attended site near Stockport.
Refrigeration Installation Service Manchester Last System
The last system had been de-commissioned and removed by the previous company. Therefore, our team already had a hole in the wall for the interconnecting pipework. Also, Unistrut was already drilled into the ceiling and the wall for the evaporator and condenser.
Pipe Run
Our team drilled 4mm holes in the stone walls with their battery drill. This is the size they needed to fit the rawl plugs we use to hold the cable tie clips. Positioning the clips at regular intervals along the wall to the hole to outside.
Connect Pipework to Condenser
Poke the pipes out through the wall and flare the ends off. We have a specialist lubricate to ease the forming of the flare. As always, remember to put the flare nut on to the pipe first- before forming the flare!
Evaporator
We lifted the evaporator onto threaded rod lengths that we has cut to size earlier. We used washers of a sufficient size to fit comfortably onto the evaporator supports.
Expansion Valve
We selected a Danfoss expansion valve because they are reliable and accurate at controlling Superheat. Theu usually come, preset from the factory at 5°C and never need to be adjusted throughout the lifespan of the plant. There are 2 faults that occur when engineers mess about with the adjusting screw of the thermostatic expansion valve: when they wind it in, you can get oil build up behind the valve causing a low pressure and a low oil return condition. When they wind it out, you can get a slug back condition which will smash up the compressor.
Expansion Valve Silver Solder
The TEV is made of brass and as the pipework is copper so we used silver solder to make the connections. These were for the liquid pipe coming in and the expansion pipe going out.
Equalising Line
The equalising line was also silver soldered onto the side of the expansion valve. This provides the valve with the pressure at the end of the evaporator which is the correct pressure for the expansion valve to sense.
4 Forces
There are 4 forces working in an expansion valve: Liquid v Suction pressure and spring v bulb pressure.
The Bulb
The bulb is also fitted to the end of the evaporator and has the same refrigerant in its liquid phase inside. This boils off and the pressure of the vapour pushes the diaphragm down on the top of the thermostatic expansion valve. This counteracts the spring and allows more refrigerant through the orifice.
Nitrogen Pressure Test
We then pressure tested the whole system according to standard industry guidelines for 1 hour. The result was a pass so we continued to the next phase of the job…
0161 237 3727
service@maximuschillers.com
Dehydration Process
The interconnecting pipework and the evaporator had air in from atmosphere and nitrogen left over from the pressure test. These gasses cannot be condensed, so they sit on the top of the refrigerant and increase the pressure. I attended site on a call out to a 1MW chiller recently after a poor repair had been carried out: 7 bar of air on top of the refrigerant pressure. This gave a false reading of subcooling of 30°C.
Vacuum Pump
We therefore use a 10 cfm vacuum pump to get the job done fast! We used our 110v transformer and extension lead to set up the vac pump with a 3/8” line and started the dehydration process.
Moisture
UK air usually has a relative humidity of about 50%. This means that there is water vapour which is evaporated in the air around us. This air had to be sucked out of the system until a vacuum was achieved. The vacuum pump pulls 2 Torr with the Torr gauge fitted directly to it so we waited overnight until 2 Torr was achieved. Less than about 8 Torr (corresponding to temperature) means that all of the moisture had been removed and the system was dehydrated.
Controller
The controller was fitted to the wall next to the door and wired in to the mains, the sensor and the condensing unit.
Commissioning
The pre-charged refrigerant was released around the system from the condensing unit and the electric was switched on.
Run Testing
The superheat and subcooling readings were monitored until the 2°C set point was achieved. The drain was also tested using our sprayer bottle.
People also like this page: Air Conditioning Installation Manchester
To find out more about thermostatic expansion valves, why not visit the Copeland Website